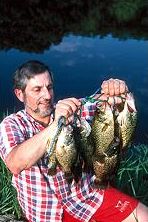
Years ago when anglers asked me about ice fishing, my standard reply was “I didn’t do it because I couldn’t master the art of casting into those small holes.” But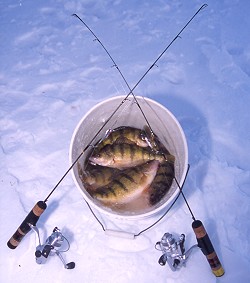 mid-winter is a tough time in the north. Our favorite lakes are covered with ice and hunting season is pretty much over. Out of desperation I began fishing for panfish, soon discovering a mid-winter treat that had long been ignored.
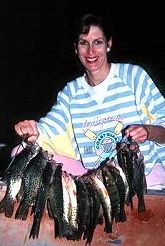
While ice fishing definitely fills a void and is as challenging as open water angling, it also supplies as with some of the sweetest fillets a person would ask for. If your taste buds are up for a challenge, fry fillets in Cajun-style breading, then dip each fork full into a pile of blue cheese dressing and then “buffalo wing” sauce before popping them into your mouth. You’ll be planning your next trip very soon.
Basic Movements of Fish
Some of the best ice fishing usually occurs during “first ice.” As the name implies, this is when the ice becomes safe enough to walk on. I know a few avid ice anglers who are slight in build (and gray matter in their heads) who venture out over wafer thin ice, and generally fall through at least once a year. But they are savvy enough to fish in pairs, plus carry ropes and giant nails to help pull themselves out of the water. I wait until the ice gets 3-4 inches thick, and even then tend to fish over the shallower flats during the beginning of the season.
First ice may occur numerous times, especially if you live in the southern third of the ice fishing range where warm fronts cause frequent thaws. Each time the ice gets thick enough to fish, panfish move into shallower, first-to-freeze areas. Sloughs canals, ditches—any type of backwater areas off a lake or river—can harbor droves of these tasty panfish. Slow-tapering shorelines on lakes can be very productive, especially if cover exists on the flats.
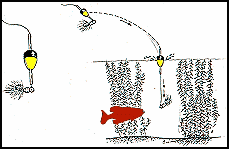
As winter progresses and the ice gets thicker, a panfish exodus to deeper water occurs. Pockets or holes in deeper weeded areas, deep weedlines, drop-offs, plus off-shore humps, bars, and points can all be productive, plus schools of suspended panfish can often be found with electronics. In shallower bodies of water, mid-winter panfish, especially bluegills and perch, can often be located smack dab on the bottom in the deepest sections of the lake.
During late winter, a time when the weather begins to warm and the ice begins to weaken, my ice fishing efforts drop dramatically. Fishing can be exceptional, but weak “black ice” makes me generally opt for the open waters in rivers. When I do get out, hot action is generally encountered on the flats just outside panfish spawning areas. Excellent results are often experienced in the 3-8 foot depths, especially very early or late in the day.
Hole Jumping Strategy
Once a specific area is targeted to fish, I usually drill between 8-15 holes. A power auger is the ultimate drilling tool, but a good, sharp hand auger will do the job, especially if the ice isn’t super thick. Two excellent hand augers are “The Edge” by H.T. Enterprises, and Strike Master’s “Laser” model. Both these augers will cut through the ice in a few seconds.
After the holes are cut and the chipped ice is removed with a skimmer, I’ll start fishing, first working the earlier drilled holes. The object is to eliminate unproductive holes and find the ones that produce even a fish or two. When starting to fish in early morning when the “hot bite” should occur quickly, holes will generally be drilled in pairs. This is because I don’t want to be drilling next to a hole that’s producing fish during prime fishing time.
If starting to fish in mid-day in anticipation of a late afternoon to dark bite, holes will be more singularly scattered about. Once I make the rounds and fish all the holes once or twice, the productive ones will be noted. It would be common to catch a least a fish or two out of 2 to 5 holes. The plan would then be to quickly drill another hole next to each productive hole so two rods can be fished. This would be done well before the prime late afternoon to dusk hours, allowing the immediate area time to settle down after the drilling.
I wouldn’t give up on all the holes that didn’t initially produce, and would periodically try them again. A couple things to consider. If a few of the unproductive holes were right into thick areas of weeds, I’d put a long stick or hand auger as far down into the hole as possible and make several big circles with it. This will create a hole in the weeds, and stir up the area, often attracting fish within minutes. Also if holes in 8-10 feet if water were productive during the mid-day hours and holes over shallower were not, re-fish the shallower area if the action comes to a halt in the 8-10 foot range, Sometimes the fish simply move in shallower.
During the last 45 minutes before total darkness, stay on the holes that were producing best earlier in the day. Numerous times I’ve seen anglers dejectedly walk off the ice just before dark with few fish to show for their efforts, and within minutes of them leaving the fish went on a rampage. The sad part is that they may have worked hard all day, only to miss that last half-hour of non-stop action.
Presentations
I’m generally fishing for bluegills and crappies with short spinning rods that have very soft tips. The soft tips enable me to use lines in the 1-4 pound test range, set a hook without popping the line, and battle a big panfish that may weigh more than the line test. I tend to use the shorter rods (24 inches) when in a shelter, while the longer rods (27-30 inches) would be preferred on open ice where holes are drilled a little further apart, and when using fixed floats.
I usually have at least 4-5 rigged rods with me. Extra rods are pre-rigged in the warm comfort of my home, because cold fingers, gossamer thin lines and tiny eyelets, coupled with eyesight that’s not quite as good as it use to be, can cause some serious re-rigging problems on the ice. This is particularly true if the fish are biting and you’re nervously trying to rig up fast. During a time when the action is hot and heavy, the last thing you want to do is attempt to tie knots with cold fingers. And if the fish are hitting during the last few minutes of light, tangles are inevitable. Just put the messed up rod aside and grab a fresh one.
If probing fishing waters less than 10-feet deep, I constantly check depth levels from a couple feet under the surface to the bottom. Under lower light conditions, during warm trends, or when the panfish are real active, it’s not uncommon to catch fish (especially crappies) just a foot or two under the ice.
If legal to use three lines in the water, I often jig fish with two and put a tip-up out for high-riding crappies. A small back-hooked minnow behind a split-shot is set 18-24 inches under the ice. In depths of 10 feet or less, this rig often produces bonus fish and alerts you of a depth pattern that may have been missed.
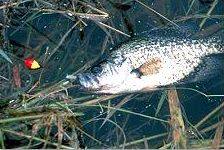
While most pan fishermen use ultra-sensitive spring bobbers on their rod tips to detect light bites, I tend to be a line watcher. A visible line is on the reel, which is linked to a fluorocarbon leader about 18-24 inches long. The line is almost never perfectly straight when fishing with a lightweight lure, so I can watch for a slight kink or bend in the line to straighten out as a fish takes my tiny spoon or jig on the lift. A bite on a free-falling bait, or when the rod tip is lowered, can easily be noted when the line buckles. In deeper water where heavier weights may be needed, a spring bobber may be preferred by some anglers.
When testing for depth, your jig can show you bottom in shallower water. In deeper water, an ice fishing “depth finder”, which is basically a weight on an alligator clip, will give you a fast and accurate reading.
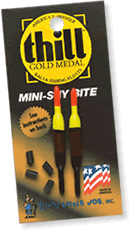 Even though most of my bites are noted by watching the line, I always have a fixed float such as a Thill Mini-Shy Bite (non-sliding) on my line unless the water is too deep for its use. The float is generally set so the bait hovers about two inches off the bottom. The float serves several purposes. It tells me quickly how far my bait is off the bottom on a hit from a suspended fish. If a bite occurs as my lure is being jiggled downward, and the float is 18 inches above the ice, I know that fish was 20 inches off bottom. If several hits quickly occur at a specific depth level several feet or more off bottom, the float on the rod used in my left hand is quickly adjusted to that level. Since I’m right-handed it’s easy to adjust to that side, but it’s harder for me to concentrate on working two lures off bottom to appeal to fish hitting at a specific depth level. A float set at the “hot level” and a lure that can be pretty much jiggled in place at that level solves the depth control problem. If the hot level changes, so will the float adjustment
Sometimes I’ll lay a rod across the opening in a 5-gallon pail, and let the line hang in the water so the wind moves the line and bait around. A float adjusted so it’s about a foot above the ice catches the wind and allows the lure to move more. It’s also easier to spot a bite on a float-rigged rod, as the motion on the swinging float will be halted when a fish pulls the line taught.
Another advantage of super-sensitive, European- influenced floats such as those made by Thill Tackle, is even the lightest bites show up. A fish doesn’t have to pull a dime-size float under, just the tip of a balanced float, which is about the diameter of the tip of a pencil and about 1/8 of an inch long.
“Balanced” floats—that’s the key to float-fishing success. Until you get to the point where you know what size ice lure balances with a specific float (weighs down the float enough so that just the tip barely breaks the surface), practice mixing and matching at home. Just take a glass of water, a float such as a Thill Mini-Shy Bite (my favorite), and hook an ice spoon or jig on one of the rubber sleeves. Drop it into the glass and see what happens. If it sinks, go to the next size float. Four sizes are available with the numbers 2 and 3 being best for typical spoons and jigs. Floats can be changed on the ice, as the Mini-Shy Bites are all interchangeable by slipping them in or out of the two rubber sleeves that come with each float.
 When fishing deeper water a fixed float becomes hard to use. Good modern float options are the pear-shaped Thill Mini-Stealth, available in 6 sizes, including one that glows in the dark, and the smaller size Center Sliders. All these floats will do a far better job than the bulky round or sponge-type floats we used for years.
Every ice angler has their favorite baits and I’ve used them all. Sometimes several small” spikes” do a better job than the larger wax worms, which are generally fished singularly. Often the opposite is true. A spare rod may hold a lively “wiggler” a few inches off bottom (use with thin-wire size 8-10 hook). The biggest “bait breakthrough” I’ve seen in recent years is you often don’t need any. Tiny spoons and jigs tipped with slivers of plastic may often do as well, or even better than lures dressed with natural bait. Some of the best ice anglers I know carve small pieces of plastics in different shapes and sizes to put on their ice-fishing spoons and jigs, and they commonly out fish nearby bait anglers.
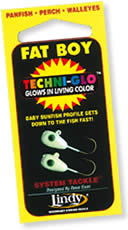
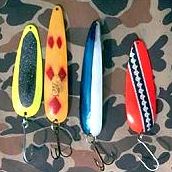
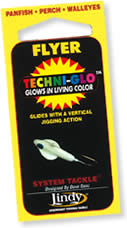 There are hundreds of ice-fishing lures on the market, but the ones I really like some of the glow lures made by Lindy Tackle. The Fat Boy is high and narrow so it sinks well for its weight yet provides a great horizontal profile. The Flyer ice spoons are just the opposite. They are wider, sink much slower and when jigged they imitate the life-like side to side darting of injured or frightened forage. The 1/16 ounce Frostee jigging spoon is great on crappies and big perch, and in the larger sizes it’s a real killer on walleyes. Tipping any of these spoons with live bait such as grubs, minnow head or small minnow often increases productivity if the bite is slow.
When initially working a hole, an aggressive jigging action is usually executed first. I believe a more active jigging presentation attracts nearby fish that move in for a look. A more subtle presentation catches the most fish, although winter panfish can get pretty active. I’ve seen where the larger fish wanted only larger spoons worked vigorously. The opposite has been true when large crappies and ‘gills will only take a near-microscopic offering that’s barely moved.
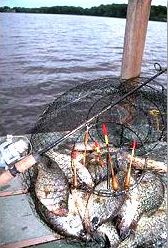
Once you do hook a decent size fish don’t try to pop it out of the hole too quickly. Line can easily break, especially if it rubs on the ice while a bull bluegill circles under the hole. Soft-mouthed crappies can also easily tear loose from a tiny hook. If the fish has some meat on it and you are using 1-2 pound test, play it a little, get it to the hole and scoop it out with an ice skimmer or your hand. Heavier line allows you to slide them out, and I clear the snow from a side of the hole for this purpose.
Ice fishing can be a lot of fun and it’s pretty easy to get started. And when you dig into a platter of crisp-fried panfish, you’ll join the fraternity of those who stalk the frozen waters.
——————————————————-
For more information about any of the fine Lindy Tackle products mentioned in this article please visit their website at: http://lindyfishingtackle.com.
 and reports of some nice crappies being caught had filtered back to me. But that was a few days ago when a warm sun peaked out, now it was cold and windy. Regardless of conditions, I had to get out for an hour or two, the winter doldrums had taken their toll. I pulled a few rods off the rack, grabbed a small box of panfish gear, and headed out the door. The cold north winds and dark skies weren’t encouraging, but it was March and almost any conditions were tolerable.
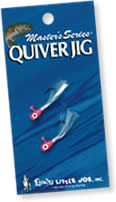
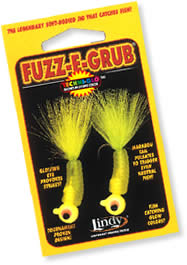 In the past my most productive spring panfish presentation, besides pure live bait, was an ultra-light jig in the 1/32 to 1/64 ounce range. Armed with a longer, soft tip spinning rod and a reel spooled full of a quality, limp 4- pound test monofilament, I could easily cast small lightweight presentations such as Lindy’s Fuzz-E-Grubs, Little Nippers, or Quiver Jigs 40-50 feet or more. Generally these lures would be fished plain, but sometimes a small piece of worm or ice-fishing grub would be added to “sweeten” it up.
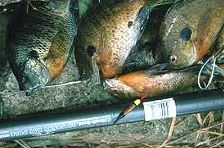 My new favorite finesse presentation for panfish involves using modern balsa wood floats, such as those found in the Thill Gold Medal series, along with wider-bodied ice-fishing type spoons. I first tried this rig several years ago on a very hard-fished pond (mine) that has been a laboratory of sorts for many fishing experiments. The fish population had seen more than its share of lures that summer, and I doubt if there were more than a few large panfish or bass swimming around without a hole or two in their mouths. Craving some mid-day action, I rigged up an ice-fishing spoon behind a Thill Mini-Shy Bite float, and dressed the lure with a small piece of worm. Virtually every cast tempted something into hitting. Bluegills and crappies of all sizes were landed, including some real beauties, along with 3 bonus bass in the 2-3 pound range. Periodically other presentations were tried, including ultra-light jigs, but that slow-falling, wobbling spoon was what really tripped their triggers. This started a lot of experimenting with this presentation, and for catching panfish under the toughest conditions (i.e. cold water-cold fronts), nothing else comes close.
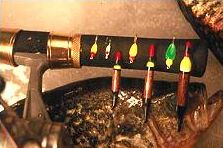 Balancing the spoon with the float is very important. Because I use these spoons and balsa floats so often when ice fishing, it’s easy for me to match two that will “balance” (spoon heavy enough to make float stand up with just the tip above the surface). Balanced floats are necessary for maximum sensitivity, minimum resistance to a biting fish, and for ease in casting. A spoon can easily be matched to a particular size Mini Shy-Bite by attaching the spoon to the float via the rubber sleeve on the float, then dropping it into a glass of water. If the float sinks you need a lighter spoon or go to the next size larger float, something that’s easily done by sliding one float off and a larger one back on under the rubber sleeves that are threaded on the line before the float is attached.
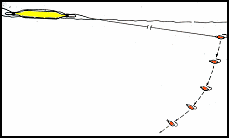 A fixed float rig is generally used in more open water, when a lure is presented in depths less that 5-feet deep, or when a pendulum-type drop of the lure is desired. This is the rig that I use for spring panfish most of the time. Since the float is fixed to the line and won’t slide, maximum depths the float can be fished are directly related to the length of the rod used. You can usually fish depths to about 2/3rds of the rod length without any problems.
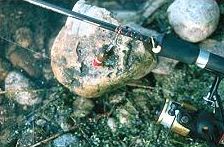 A favorite slip-float rig features a pear-shaped Mini-Stealth float. This rig can be used in a little deeper water, but its primary benefits are that a more vertical action can be given to your jig, and it can be cast or dropped into tighter spots because you don’t have 3-4 feet of line between the float and spoon. Sometimes a small split-shot is added 6-inches to 2-feet above the spoon if the line isn’t being pulled through the hole by spoon weight alone. More weight is often needed in a little deeper water, to sink the float deeper into the water, when longer casts are made or when it’s windy. Adjust according to conditions.
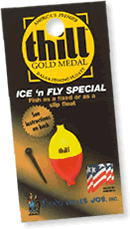 Both these floats will resist wind or current pretty well, especially if balanced so just their tips stick up above the surface. But on rare occasions I might want some drift to my presentation to cover an area. The old fashioned red/white snap-on style bobbers will give you plenty of wind drift, and often too much if you use these a lot, but the medal hook that pinches the line back into the body really stresses light line. I’ve broke numerous lines in my lifetime because of this until realizing what was happening. A better way to achieve wind or current drift is to use a rounder float such as a Thill’s Ice’n Fly Special. This float will drift in current or wind, can be rigged as a slip or fixed float, and will not stress light line on a hook-set or when fighting a fish because the line goes through the middle of the float.
 One bet I always win with unsuspecting friends is to see who can catch a specific amount of panfish the fastest from the bank. If the fish are within reach of the long pole the bet is on, and if they can catch 5-6 fish before I get number 10 they have done well. I can easily swing the rig into a good spot, no casting or retrieving is necessary, and fish can quickly be plucked from the water. And while live bait on a plain hook can easily be swallowed, a spoon usually lip-hooks them, making hook removal a lot faster.
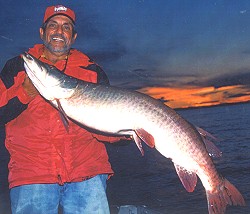 Monster #2, 2002
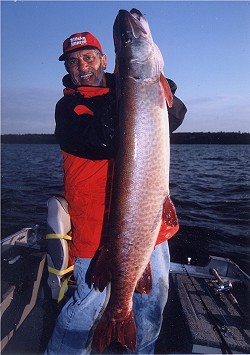 Monster #3, 2003
 A jig, dressed with live bait or plain, can be used effectively below a slip float. Because the weight (jig head) and attracter (jig body and/or bait) are at the same point, this set up has certain advantages over a standard weighted live-bait float rig. Every movement of the float, whether caused by waves or angler, activates the jig. You don’t have most of the action absorbed by a weight clamped a foot or two above a hook.
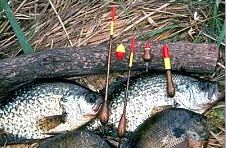
 Bodied Wagglers come in lengths up to thirteen inches. This makes them visible in big rough waters, whether your fishing for crappies in a wind-swept reservoir or perch on the big, rolling waters of the Great Lakes. More or less weight can be used to regulate the amount of the float’s stem that’s above the surface. Obviously, more stem above the surface will make float watching easier on a windy day.
 When normally confronted by a big weed bed with lots of potentially good-looking water, trolling usually allows me to quickly check it. I would commonly run bucktails, big spinnerbaits, or shallow-running jerkbaits over the top, and deeper-diving jerkbaits and crankbaits along the edge. Fifteen minutes of trying some of those techniques quickly showed they were a waste of time. Here was the problem. Weed growth was very inconsistent, sometimes it came to the surface, other times it was 3-4 feet below. Lures that ran at a specific, near-surface depth level would constantly foul up in the erratic growth.
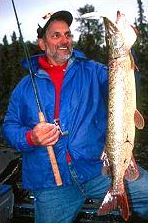
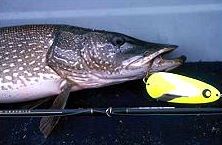
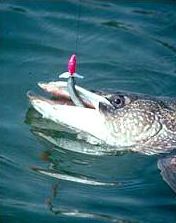
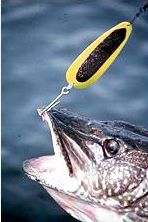 When fishing flutter spoons around weeds, use one with a large single hook, and put the hook on so the point faces the inside or cupped side of the spoon. This rigging will give you the minimum amount of weed snags and make releasing pike easy. With a little practice this single hook spoon can be cast over thick vegetation and skittered across the top, periodically stopping the retrieve so the lure flutters down into holes or along edges. The trick to avoid hanging weeds is to halt the lures flight just before it hits the water by engaging the reel and lifting the rod tip.
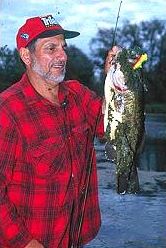 Years ago I would have left clearer and/or shallower lakes during hot, bright days-now I thrive on these conditions!
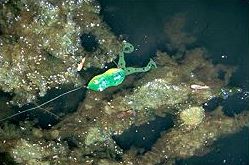
 We double anchored about 10 feet from the edge of the floating plants where they formed a deep, open pocket. Daub pulled a long-handled, extra stiff baitcasting rod out of his rod compartment, grabbed a lively shiner out of a bait well, and hooked it underneath, just behind the anal fin.
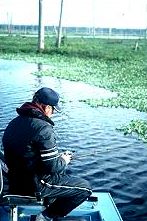
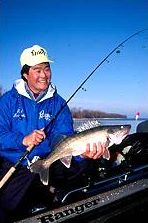 Walleyes are often found in deeper or fast moving waters, and no lure presentation can be worked with more precision and/or depth control than a big jig. When drifting over a deeper flat area the big jigs will pull your plastic or live bait offering right down to the bottom and keep it there. Then it’s a matter of fine tuning vertical action, drift speed, lure color and what’s put on your jig-plastic or live bait-to achieve maximum results.
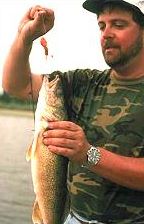
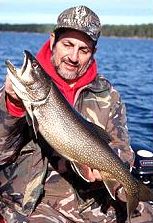 Many fishermen that travel into the north county for pike, walleyes and other species, often find that lake trout are also available. But these anglers often feel ill-equipped to pursue these denizens of the deep because they didn’t bring along any specialized gear for dredging the depths. But there is no need for wire lines, heavy weights, diving planes, downriggers an other cumbersome gear if you toss a handful of jumbo jigs into your tackle box.
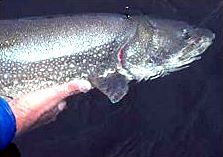 Although the big jigs can be fished effectively on “gutsy”, 6 1/2 to 7 foot spinning rods and 8 to 12-pound test lines, I tend to favor baitcasting gear for most situations. My favorite rod for handling jumbo jigs is either one of the 6 1/2 foot baitcasting rods in South Bend’s “System” series. This rods are the ideal length, have excellent power, great sensitivity and are inexpensive. They also have over 8-inches of handle behind the reel-great for extra relief and leverage when fishing.
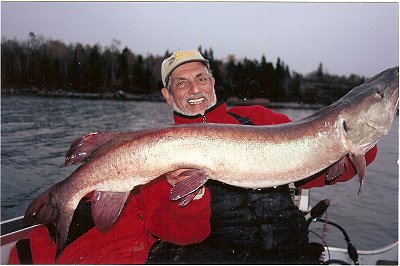
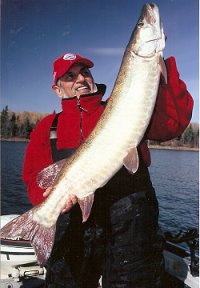 “Here we go again”, I thought as my partner Mike Zielonka put his third musky of the day into the net. Minutes later I finally connected with a nice fish. We were on our annual Lake of the Woods fall musky trip and Mike had seriously “big fished me” the last three years. Each year he has boated at least one fish over 50-inches, culminating with a 55 ½ inch monster in October of 2005.
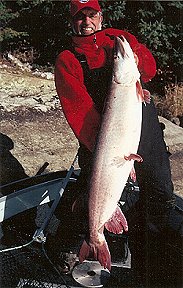 Day two started slow with me catching the first three fish, all under 37-inches. Then it started! The next was a chunky 44-incher, quickly followed by a 52-incher with the girth of a small barrel. It wasn’t a true 40-pounder, but a good-sized cisco would have put it close. About an hour before dark a 40 ½ incher slammed my Grandma. What a day 6 muskies, including a fat 52-incher.